⚠️ Customer Safety Notice
This article contains general information intended for homeowners and occupants. Installation, servicing, repairs, electrical work, gas work and refrigerant-related work must only be carried out by appropriately qualified and licensed personnel.
Before performing any checks or maintenance, ensure the equipment is switched off and safe to access. Do not remove covers, enter roof or ceiling spaces, work at heights or attempt repairs unless you are qualified to do so.
If in doubt, contact an authorised service agent or licensed tradesperson. Safety must always take priority.
Following is the procedure to offset the displayed temperature on the SCC Spectrolink.
NB: This only applies to Spectrolinks approx. April 2010 onwards that contain the software to allow secondary zone Spectrolinks to be programmed individually.
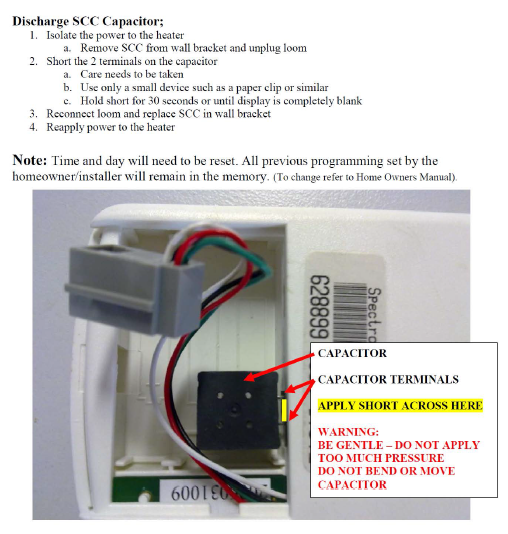
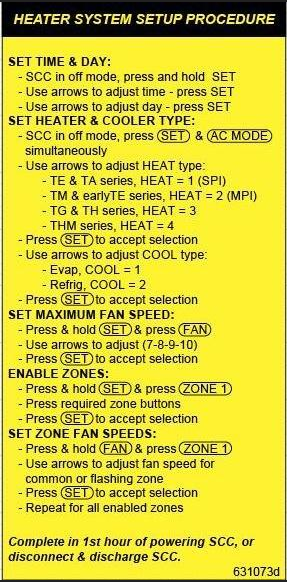
This must be done with the 1st 15 minutes after power-up or disconnect from the loom, discharge the cap and re-connect (instructions on discharging SCC Spectrolink capacitor below).
- Have the SCC Spectrolink in the Heat Off mode
- Enter the service mode by pressing Zone 3 until F01 appears
- Press and hold SET down, within half a second press the up arrow (whilst still holding the SET button down)
- Press the up or down arrows to adjust the offset – options are -2, -1, 0 +1, +2 (+1 and +2 are displayed as 1 and 2)
- Press SET
- Exit service mode