
TQR Heater Wiring Diagrams
⚠️ Safety Notice – Gas Heating Products
This appliance must only be installed, commissioned, serviced and repaired by suitably qualified and licensed personnel.
Before commencing work, complete a task-specific risk assessment and ensure gas and electrical safety requirements, ventilation provisions, safe access, adequate service clearances and appropriate PPE have been considered. All work must comply with applicable regulations, standards and manufacturer requirements.
Particular care must be taken when working around gas systems, electrical components, combustion products, hot surfaces, moving parts, roof spaces, ceiling spaces and confined spaces.
Do not proceed if safe access, required clearances, ventilation requirements, confined space risks or appropriate safety controls cannot be achieved and maintained.
Safety takes priority over diagnosis, repairs, installation schedules and customer expectations. If the task cannot be completed safely, it must not proceed until the risks have been adequately controlled.
Overview
Wiring Diagrams
Diagram | Models | |
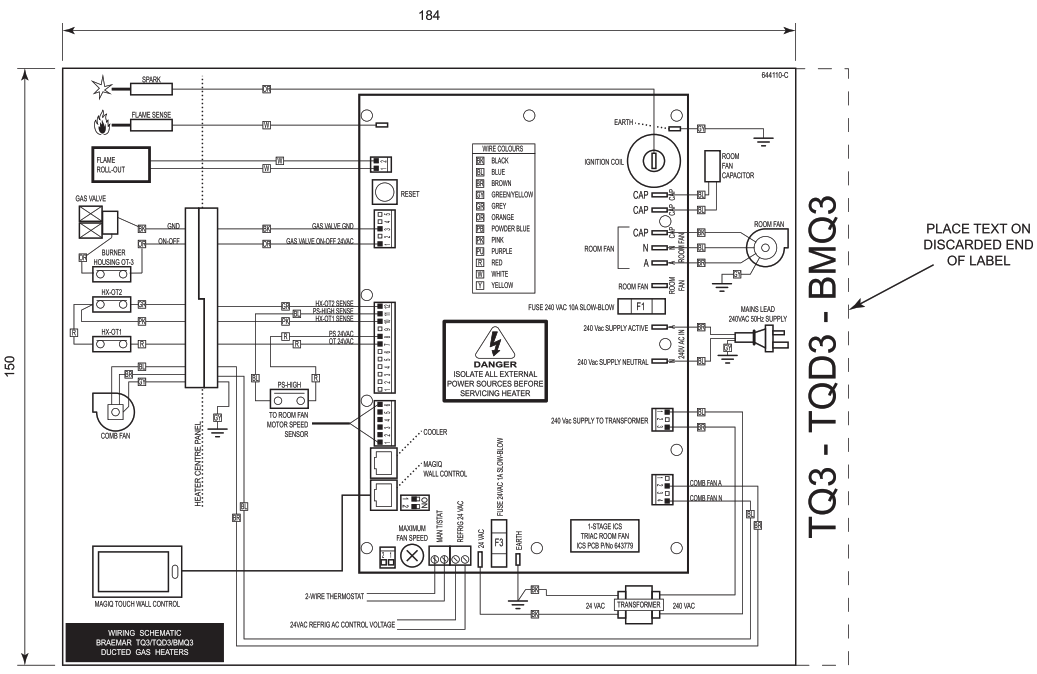
644110 | TQR3, TQRD3 | Single stage gas valve (ON/OFF only). No staging or modulation. Basic relay control. |
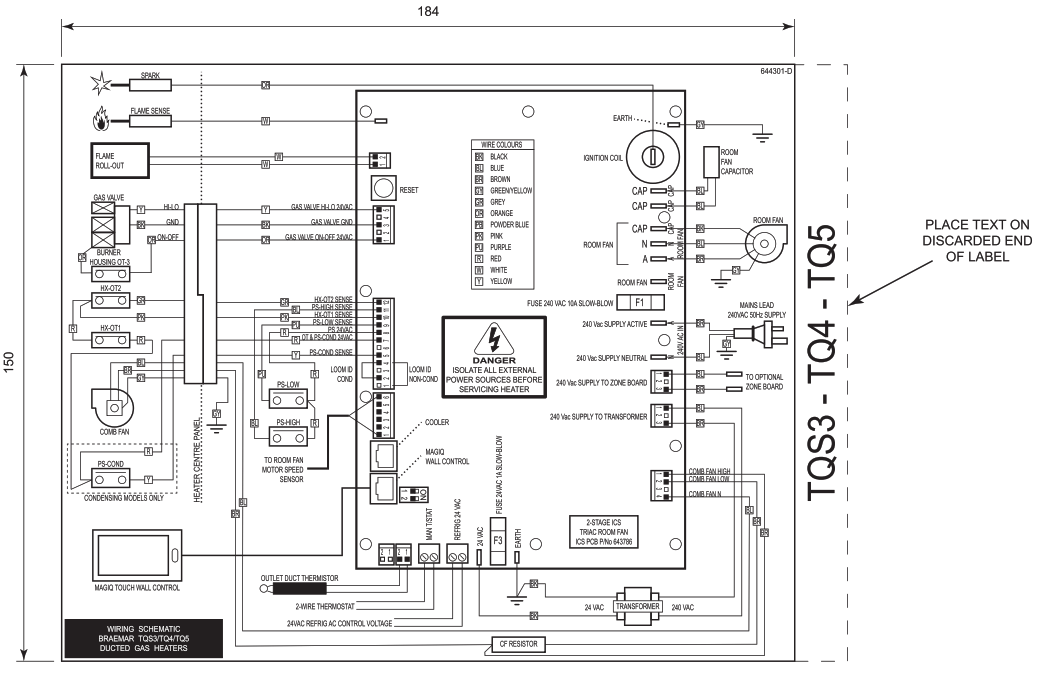
644301 | TQR4 | Two-stage gas valve (LOW + HIGH). Extra wiring for second coil and stage control output. |
644141 | TQR5, TQRD5 | Modulating gas valve. No stages – PCB sends variable signal to control output. Uses sensors and comms. |
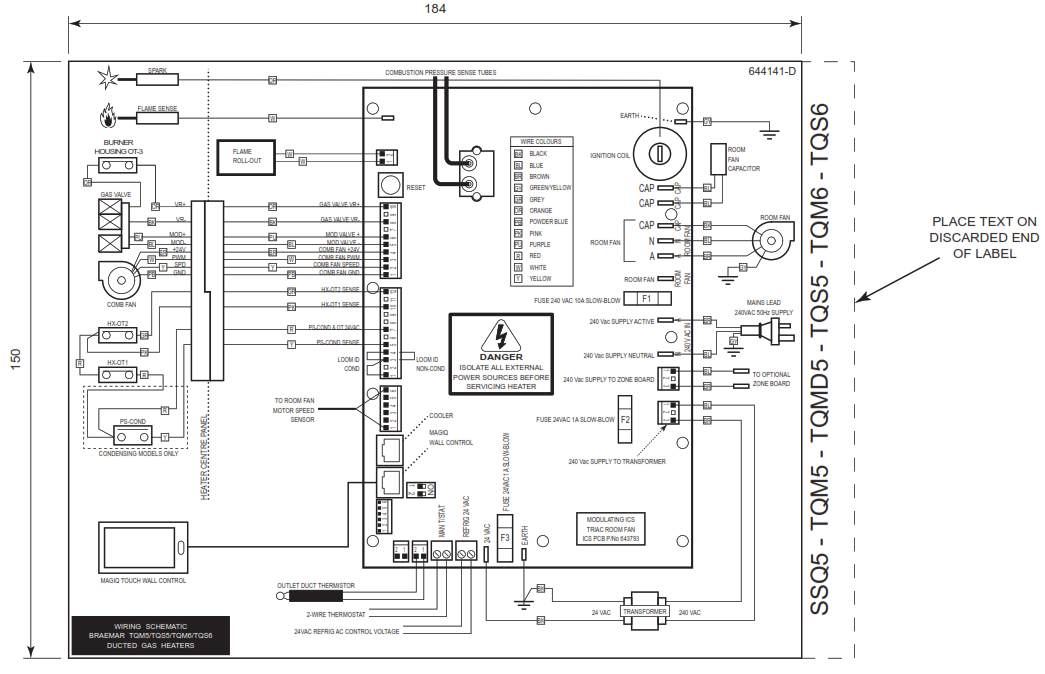
644141 | TQR6 | Same as 5★ PLUS condensate and additional safety wiring (drain, sensors, flue fan where fitted). |
Key Differences
1. Gas Valve Control
- 3★ (644110) → 1 output (ON/OFF)
- 4★ (644301) → 2 outputs (LOW + HIGH)
- 5★ / 6★ (644141) → Modulating signal (no stages)
2. PCB Type
- 3★ / 4★ → Relay-based control
- 5★ / 6★ → Modulating ICS control (communication + sensors)
3. Additional Circuits
- 4★ → Extra wiring for stage 2
- 5★ → Sensor and modulation control wiring
- 6★ → Adds condensate / flue / extra safety circuits
Bottom Line
- The wiring diagram changes based on how the gas valve is controlled (on/off → staged → modulating).
- 6★ only differs from 5★ by added components, not core control logic.
- TQR vs TQRD do not change wiring diagrams.
3★ Heaters – Single Stage (Diagram 644110)
4★ Heaters – Two Stage (Diagram 644301)
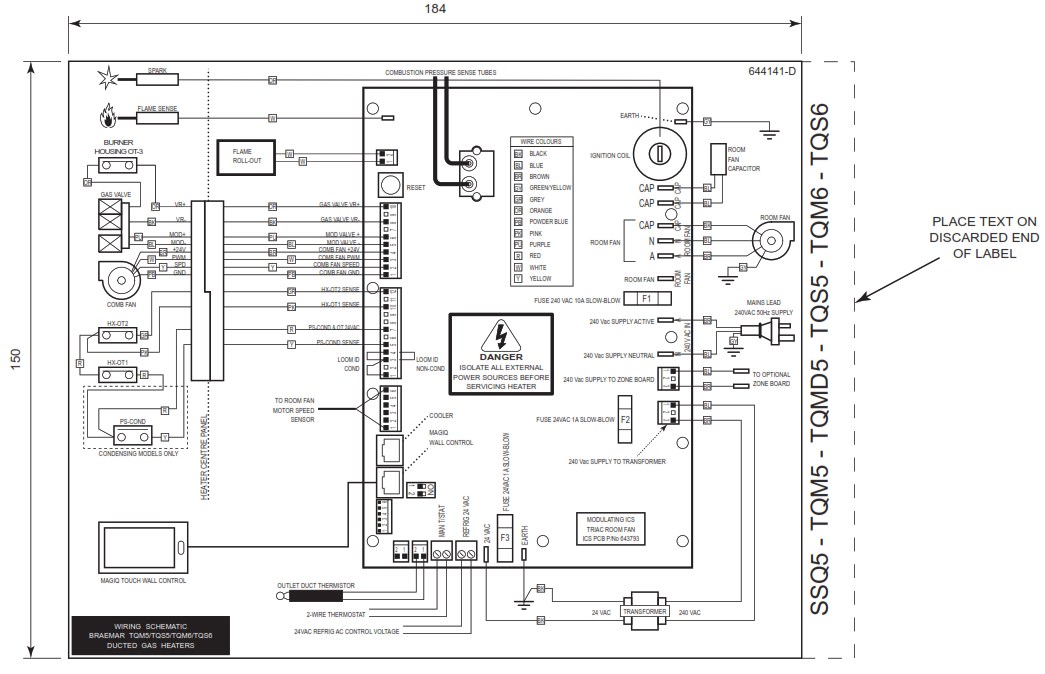
6★ Heaters – Modulating Condensing (Diagram 644141)
Wiring Identification Tips (Field Use)
Quick Identification Guide
- Single gas valve coil → 3★ single stage
- Two gas valve coils (Hi/Low) → 4★ two stages
- Modulating gas valve plug → 5★ / 6★
- Modulating gas valve with Condensate pressure switch and tubing → 6★ condensing