This appliance must only be installed, commissioned, serviced and repaired by suitably qualified and licensed personnel.
Before commencing work, complete a task-specific risk assessment and ensure gas and electrical safety requirements, ventilation provisions, safe access, adequate service clearances and appropriate PPE have been considered. All work must comply with applicable regulations, standards and manufacturer requirements.
Particular care must be taken when working around gas systems, electrical components, combustion products, hot surfaces, moving parts, roof spaces, ceiling spaces and confined spaces.
Do not proceed if safe access, required clearances, ventilation requirements, confined space risks or appropriate safety controls cannot be achieved and maintained.
Safety takes priority over diagnosis, repairs, installation schedules and customer expectations. If the task cannot be completed safely, it must not proceed until the risks have been adequately controlled.
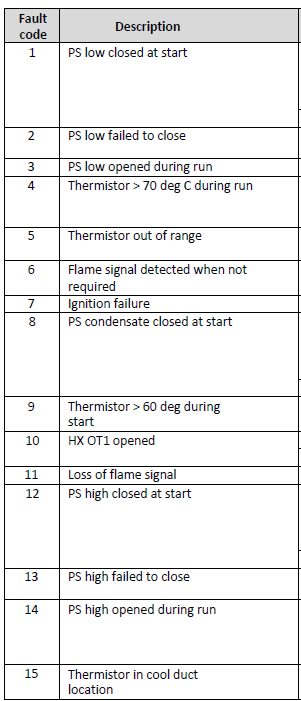
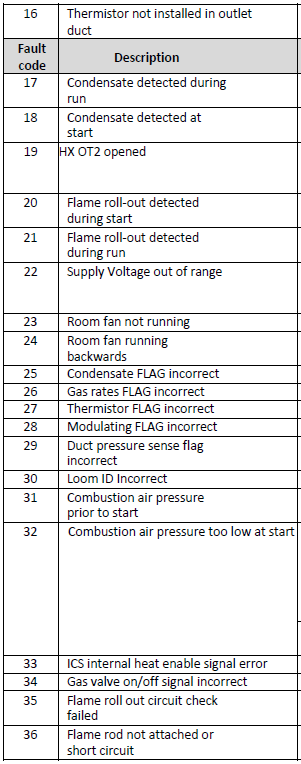
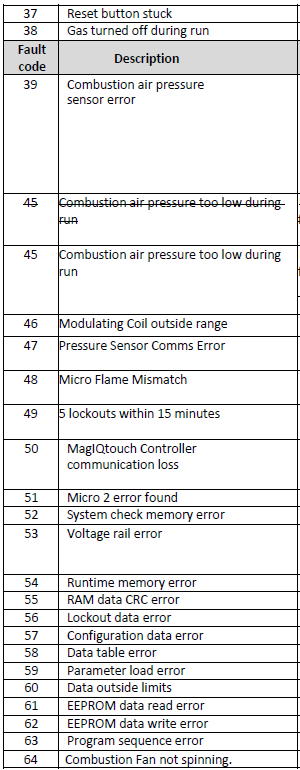
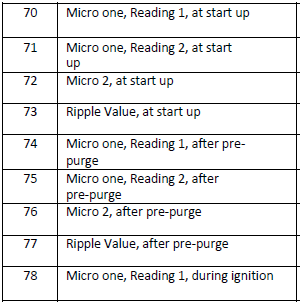
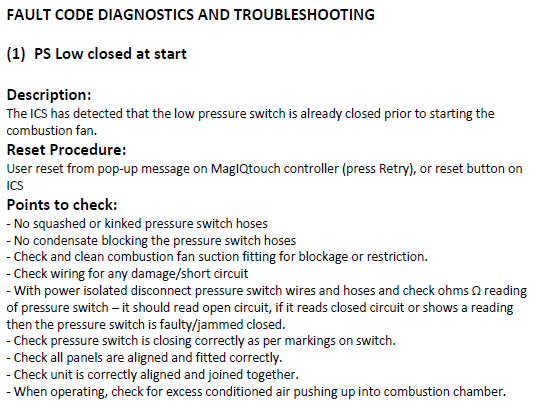
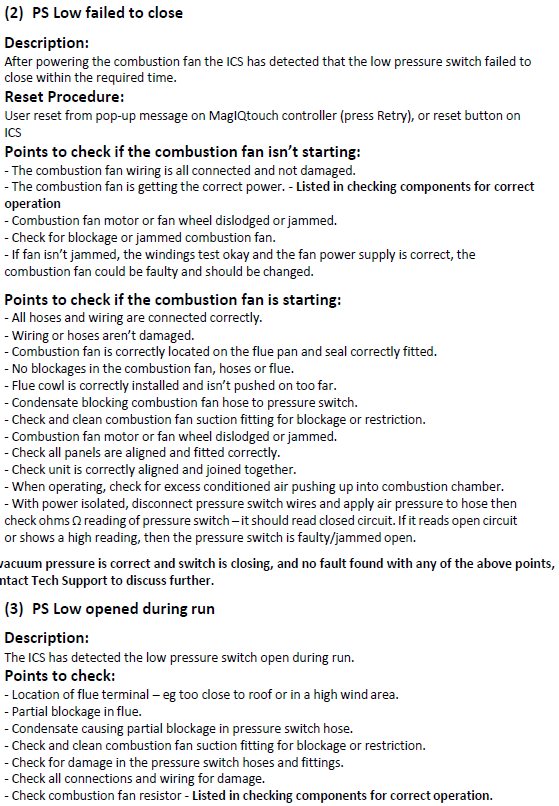
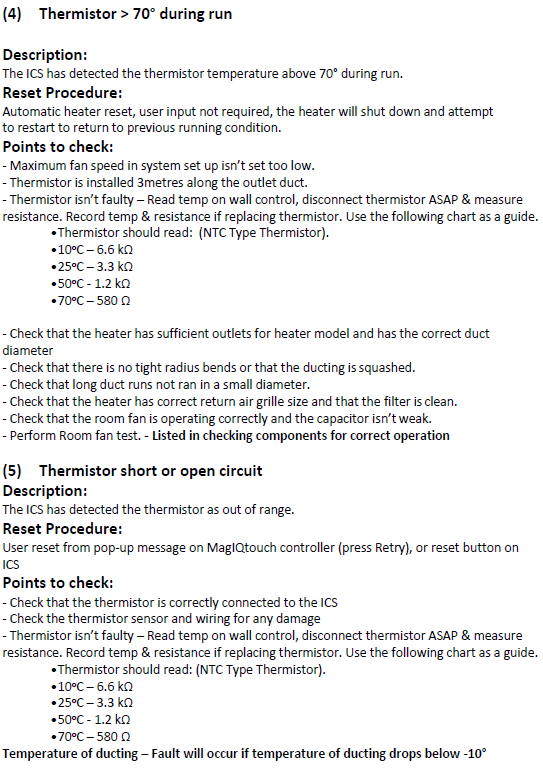
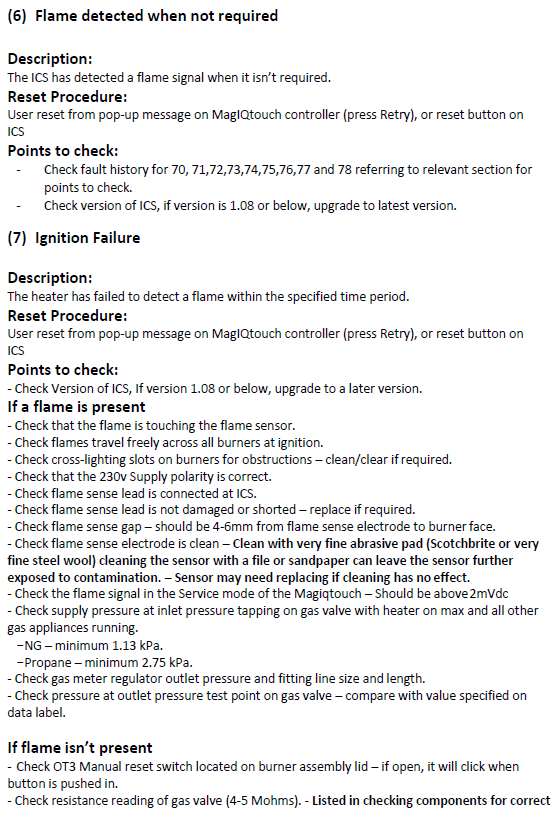
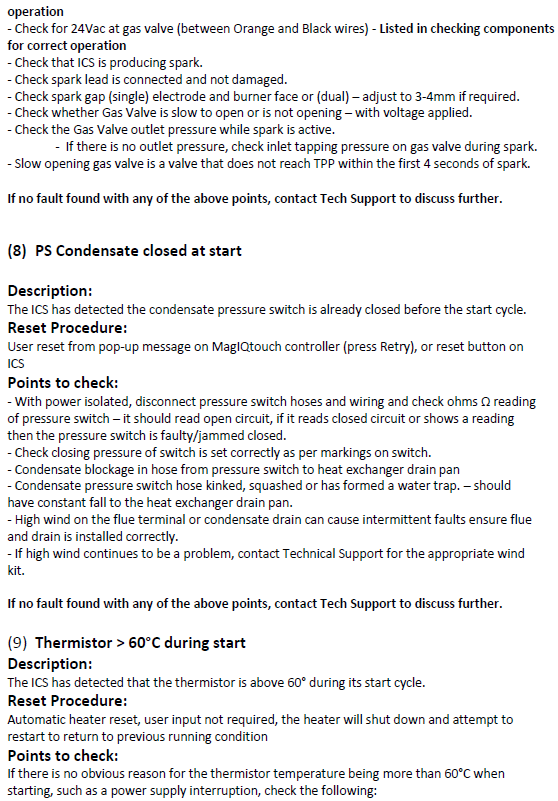
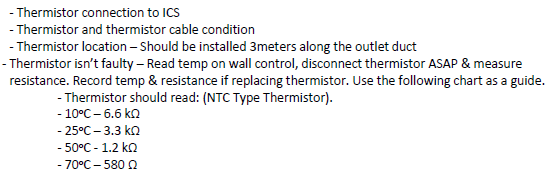
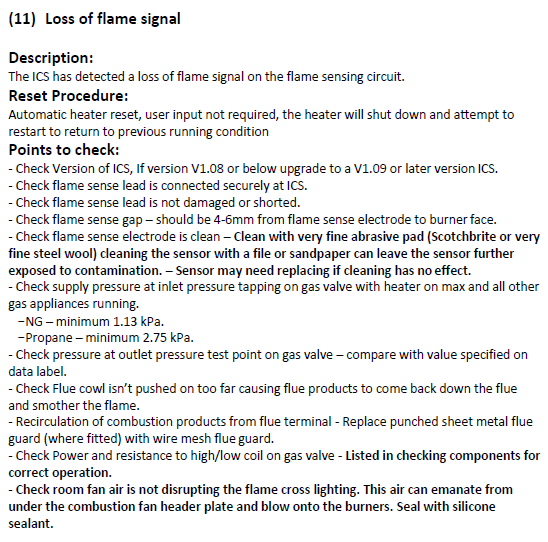
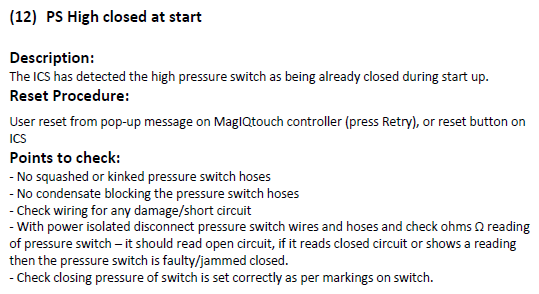
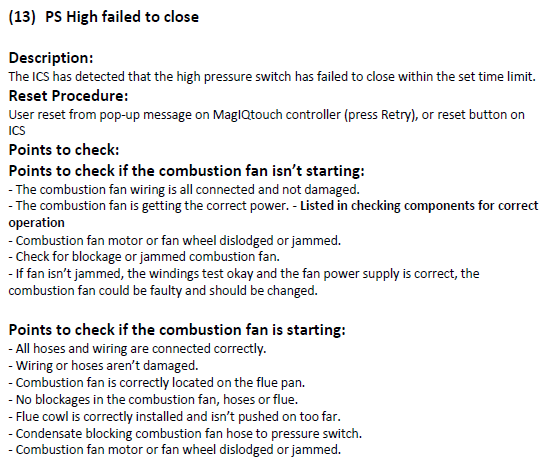
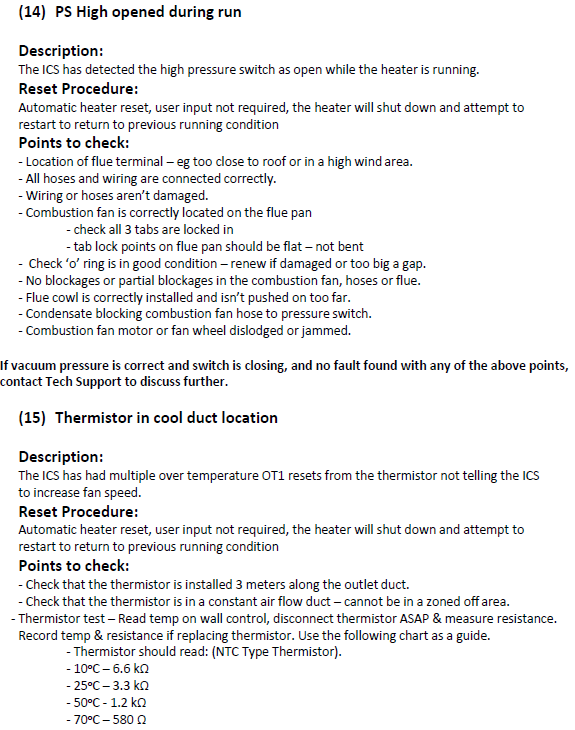
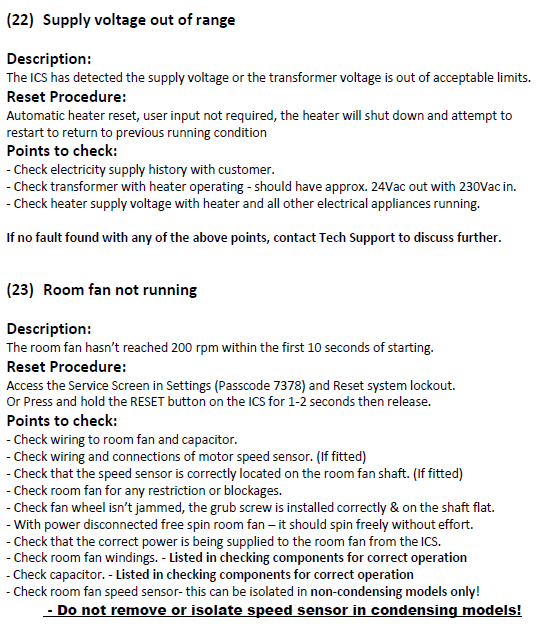
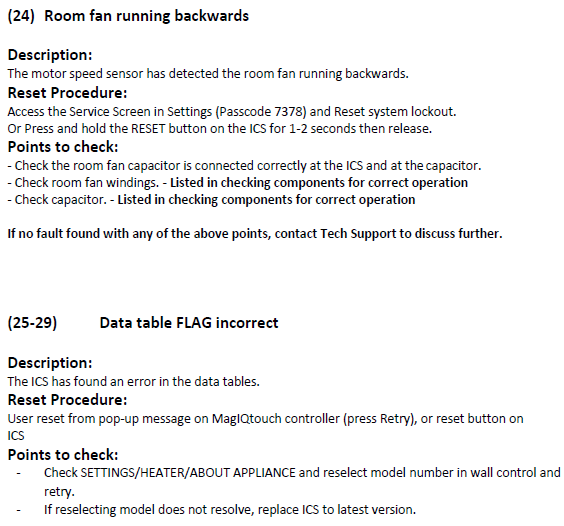
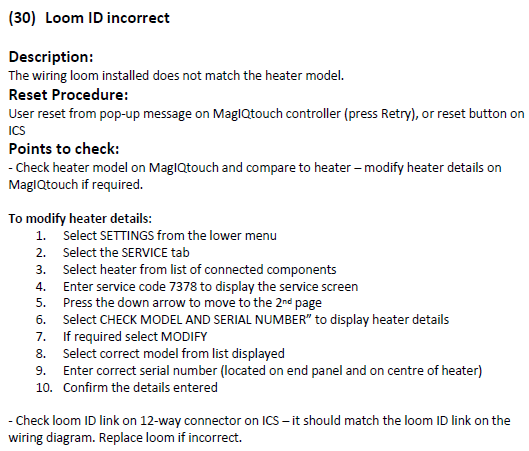
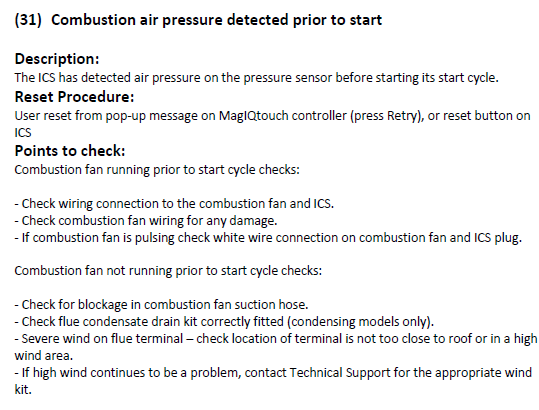
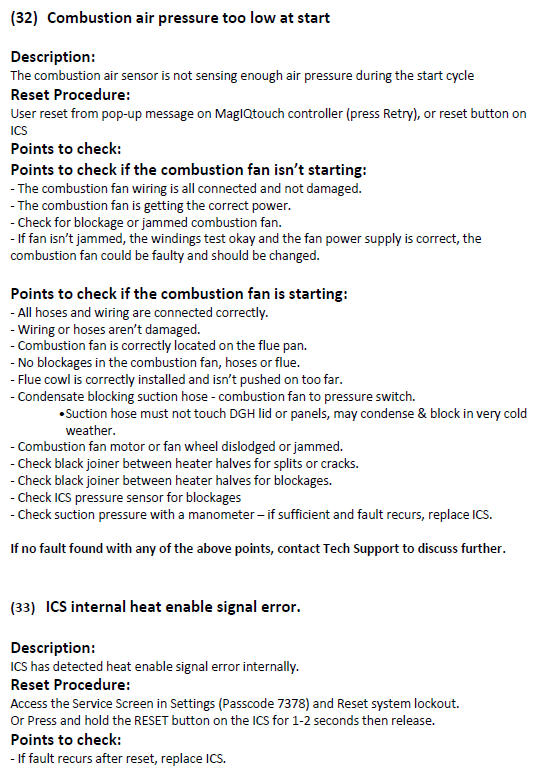
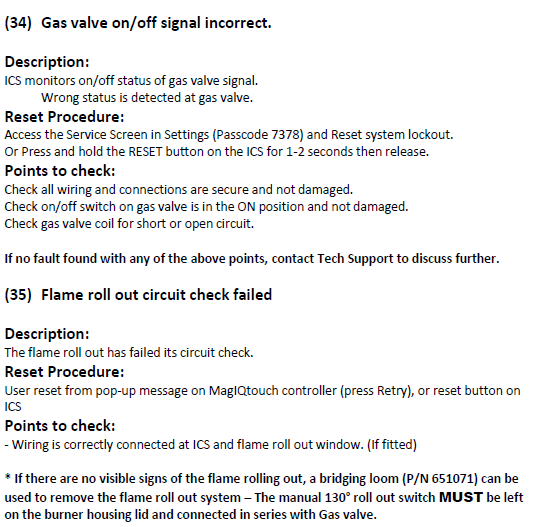
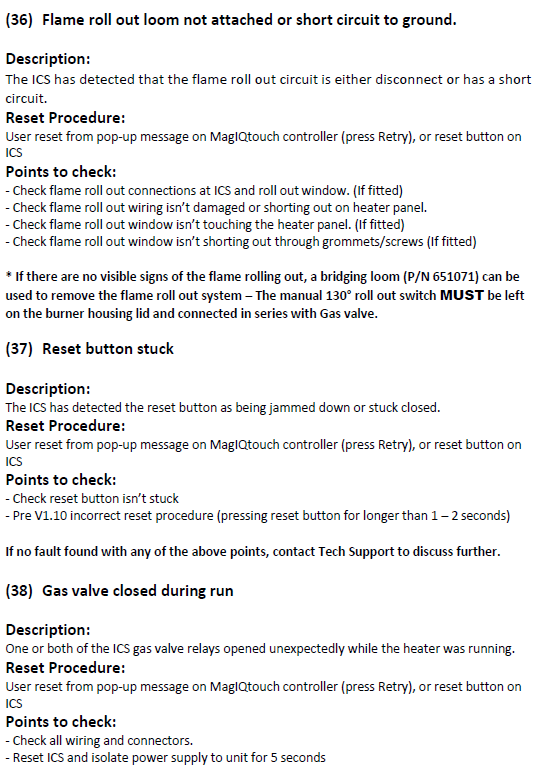
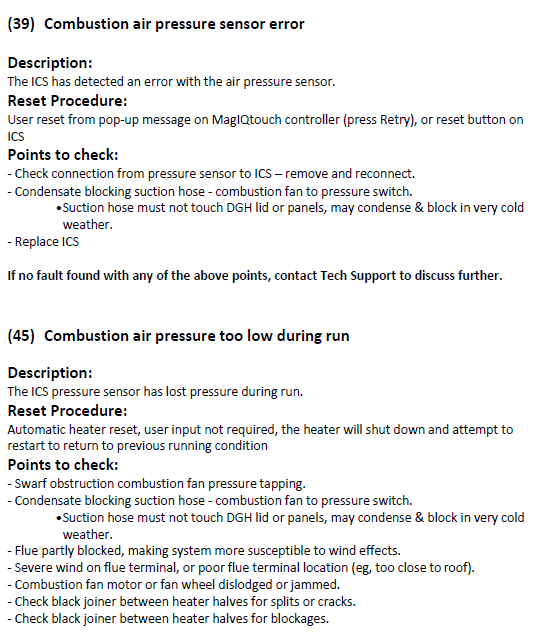
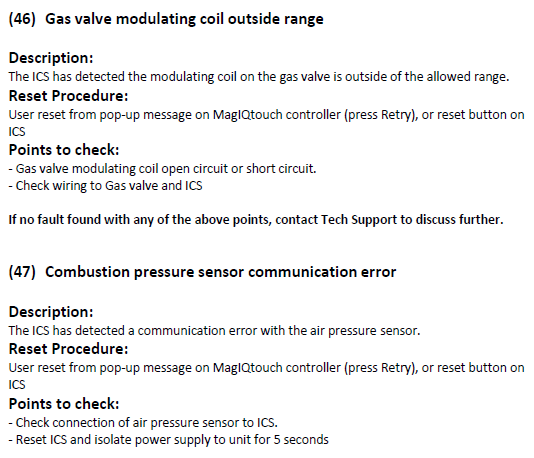
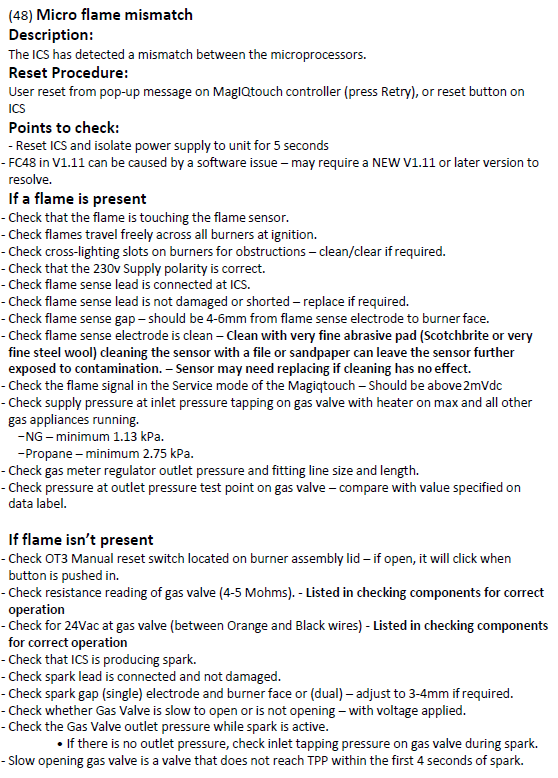
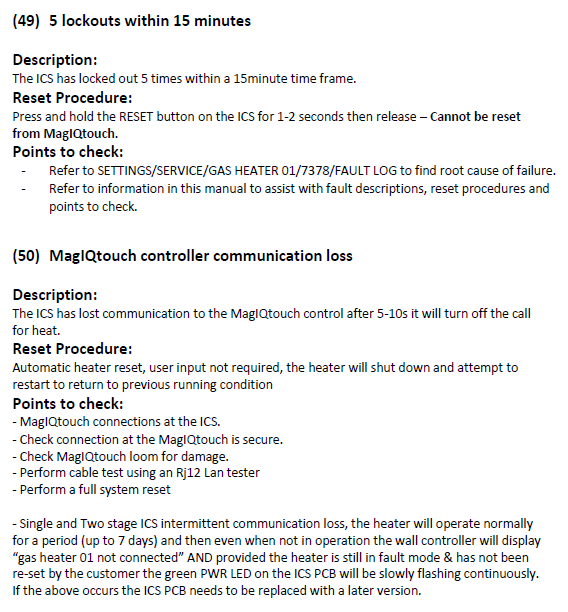
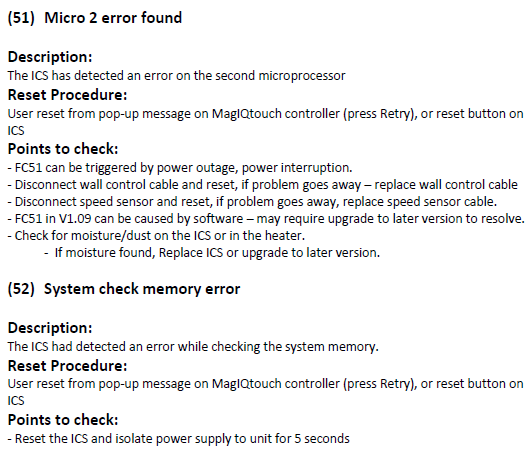
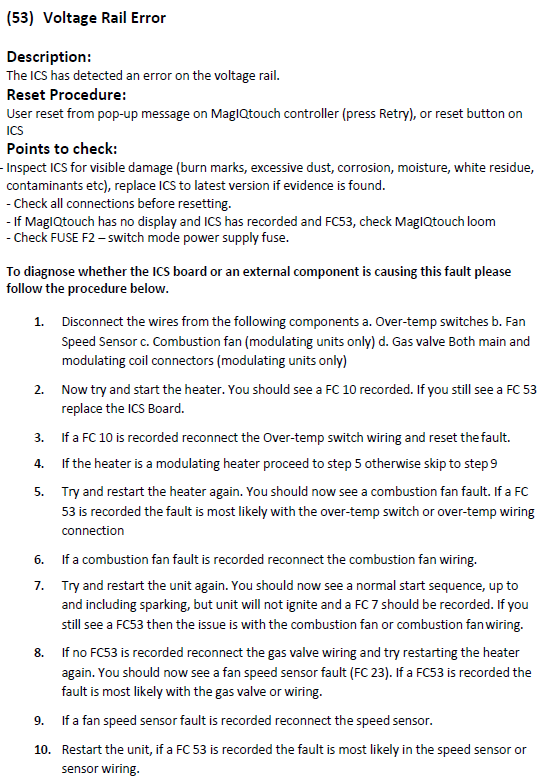
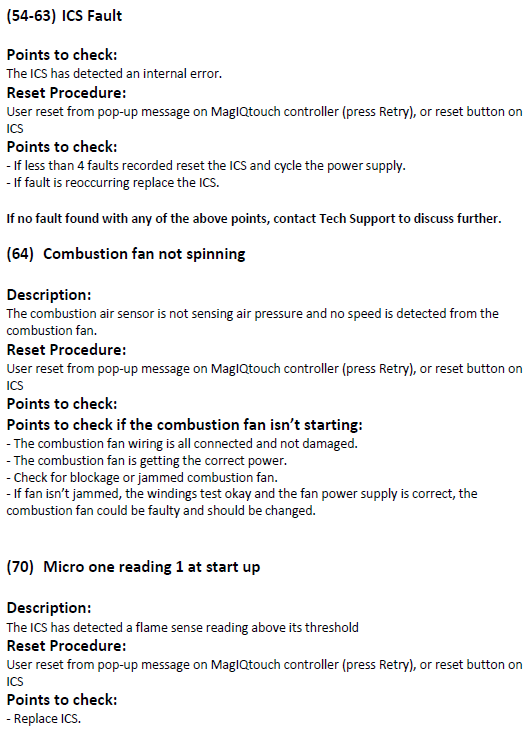
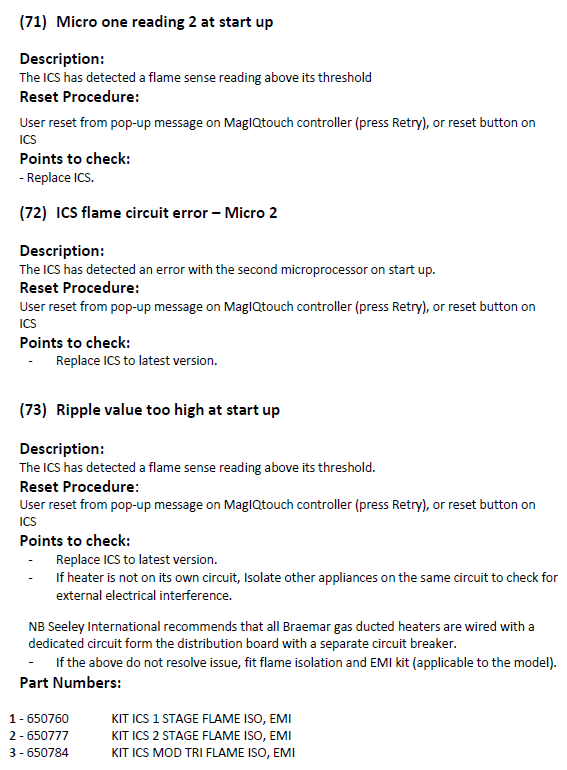
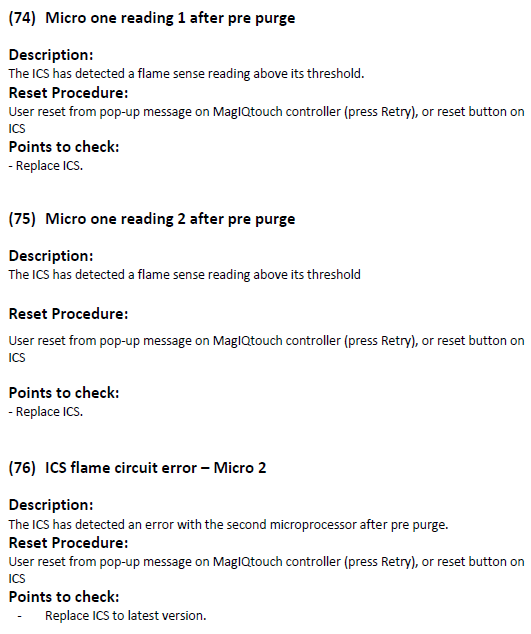
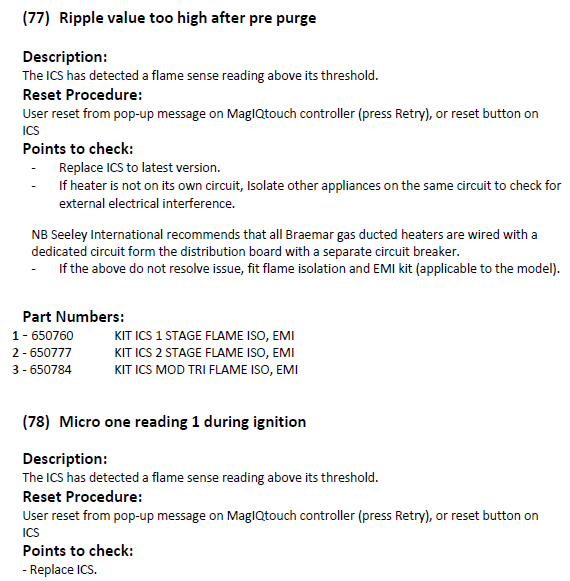
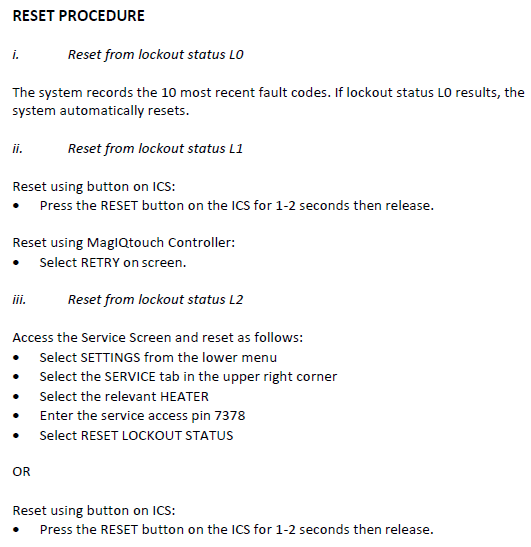
For a comprehensive listing of fault code diagnostics see the attached Service Guide Pdf:
RETRIEVING STORED FAULT CODES USING MAGIQTOUCH WALL CONTROL
The 10 most recent diagnostic codes are stored and can be retrieved using the MagIQtouch Controller. In most instances the MagIQtouch Controller will display any current diagnostic code details on the main screen. To review the stored diagnostic codes follow the steps below – use the Master MagIQtouch Controller if there are more than one installed:
1. Select SETTINGS from the lower menu
2. Select the SERVICE tab in the upper right corner
3. Select the relevant HEATER
4. Enter the service access pin 7378
5. Select FAULT LOG to view the 10 most recent fault codes – the most recent is at the top
6. Select the “i” icon to the right of the fault code for a description of the fault
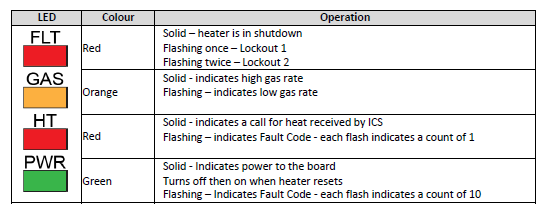
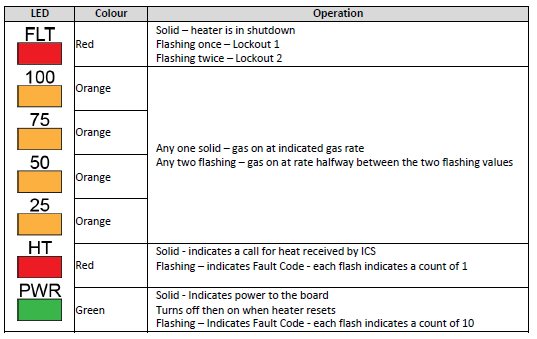
Fault codes are also indicated via the LEDs on the ICS. The LEDs will flash in a sequence to indicate the Fault code and lockout condition. The green “PWR” LED will flash and indicate 10 units per flash, the red “HT” LED will flash and indicate 1 unit per flash. The “FLT” LED will either stay solid indicating Lockout 0, or flash once then pause and repeat for Lockout 1, or flash twice then pause and repeat for Lockout 2.